How to install Bliss OS X86 on PC and VirtualBox
Bliss OS x86 is another operating system based on Android. It can be said that this is a branch of the Android x86 project, open source and free.
The custom Android Bliss OS is not only available for laptop or PC X86, but it is also possible to use other x86-based devices to install it, including smartphones and tablets. Bliss OS supports both 32 bit and 64 bit devices.
Bliss OS builds are also compatible with Chromebooks and Macbook running on Intel or AMD CPUs. For gaming, Octopus included a keymapping solution developed by the Phoenix OS team (another Android operating system).
In this guide, Tipsmake will show you how to install OS X86_X64 Bliss on PC and VirtualBox.
Minimum system hardware requirements to install Bliss OS
- X86 processor
- 1GB hard drive
- 512 RAM minimum, 2GB recommended
Download the Bliss ISO image
1. To install this Android operating system on a PC, you'll first have to download the bootable Bliss OS x86_x64 ISO file.
2. Go to the downloads section on this page here.
3. When you visit the Bliss OS download store, you will find different folders such as Bleeding_edge, Nightly, Stable, and Udoo .
4. Select and open the Bleeding Edge folder .
5. You will find many releases of Bliss OS - both stable and beta.
6. Download the latest stable operating system ISO file version. Android 10 is available on it.
For example, in this case it would be: Bliss-v11.4-Stable - OFFICIAL-20181228-0938_x86_64_k-k4.20-gal_m-18.3.1_pie-x86_f-dev-kernel.org.iso
7. After downloading the Bliss ISO file, proceed to the next part of creating a bootable pen drive.
Create bootable USB Bliss x86_X64
1. After the Bliss OS ISO file has been downloaded on your device, it's time to create the bootable USB.
2. To do that, first, download the Rufus Bootable USB software.
3. Plug the USB into the system you want to boot.
4. Click Rufus setup and run it. This USB bootable tool is portable software and does not require installation.
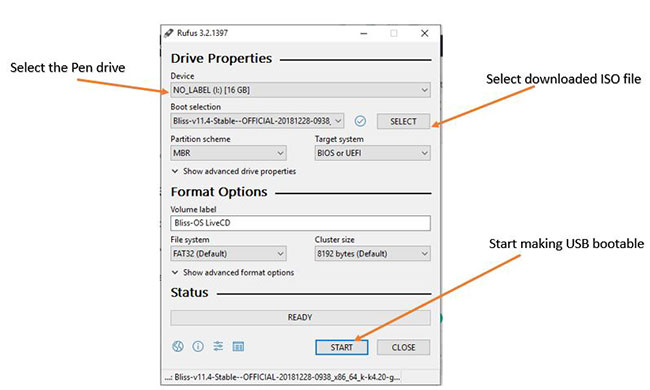
5. When it opens, select the drive from the Device section .
6. Then click the SELECT button and select the downloaded Bliss ISO image above.
7. Finally, click the START button and the booting process for Bliss OS will begin.
8. You will see a pop-up, please ignore it and press the OK button .
9. You will be warned that all data on the drive will be erased, so make sure nothing important is on the USB. Then click the OK button .
Install Bliss OS on PC and VirtualBox virtual machine
After creating the bootable USB. Insert it into the PC system where you want to install Bliss OS.
Step 1: Boot the system using USB boot Bliss OS
If the system's first boot order has been set to Removable media , the operating system will automatically boot. If not, first set the boot order or use any F2, F8, F12 or Esc key depending on your system BIOS to select the bootable media or device.
Step 2: Install Bliss OS on the hard drive
When the first boot screen appears, select the option Installation- Install Bliss-OS to hard disk .
Step 4: Create / modify partition
Use the Tab key and then the arrow keys to choose Create / Modify partitions and click the OK button .
Step 5: Primary partition
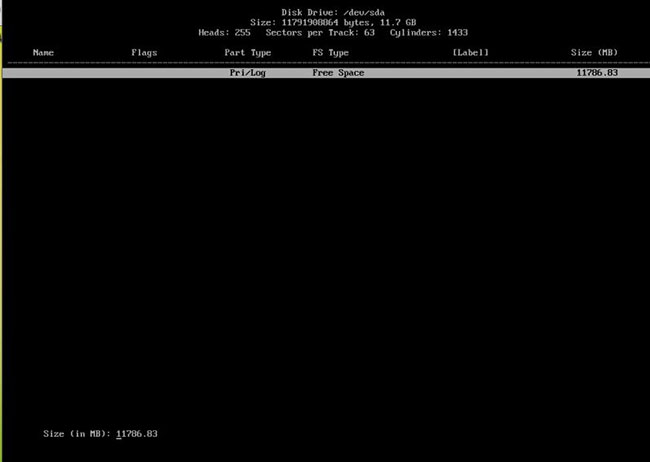
Here, you will see the drive and its size in MB available in both PC and virtual machine. Select the Primary option and press the Enter button .
Enter the amount of space you want to allocate to Bliss OS and press Enter.
Step 6: Mark the main bootable partition
Now mark the created primary partition as bootable. For that, just select the Bootable option and then the Enter button .
Step 7: Record changes to prepare your Bliss installation drive
After the above step, you need to write changes to the drive. Select the Write option and press the Return / Enter key again .
To make changes, it will ask for your permission. Enter yes.
Once the process in the above step is complete, it is time to complete the partition table creation tool. Use the Quit option .
Step 8: Install Bliss OS
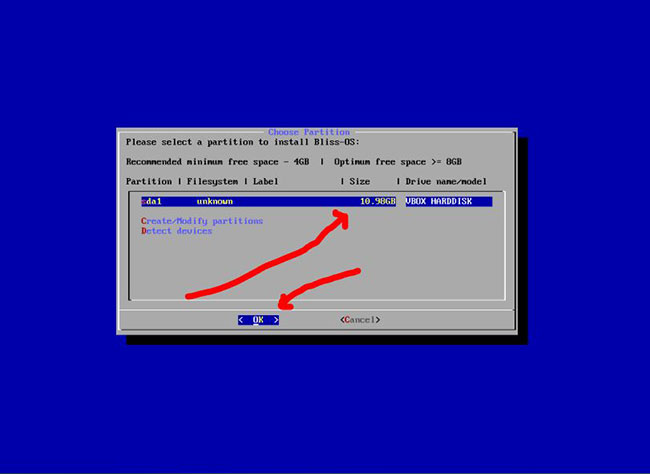
Immediately after exiting, you will see the Choose Partition section again , where this time you will find the partition to install the operating system. Select it and press the OK button .
It will ask to create GPT, you just need to choose YES.
Format the drive using ext4 or any other file system format you want.
Select the Yes option .
Step 9: Restart your PC or virtual machine
Once done, remove the USB flash drive, choose the Reboot option and Bliss OS will be installed on your system.
Install Bliss OS on VirtualBox
Although the entire installation process is similar to that for the Virtualbox virtual machine, the start is a bit different.
Step 1 : Open VirtualBox.
Step 2 : Click the New option given on the menu.
Step 3 : Name the virtual machine.
Step 4 : Select Type as Other and choose 64-bit version of Other / Unkown.

Step 5 : Specify the RAM, 2GB will be fine but it is recommended to increase it up to 4GB for better performance.
Step 6 : Select Create a virtual disk now and click the Next button .
Step 7 : Allocate about 10GB of space or more, if you want to install apps or games from Play Store.
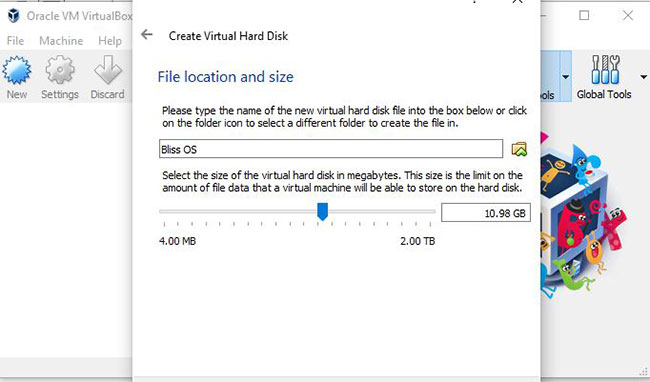
Allocate about 10GB of space or more
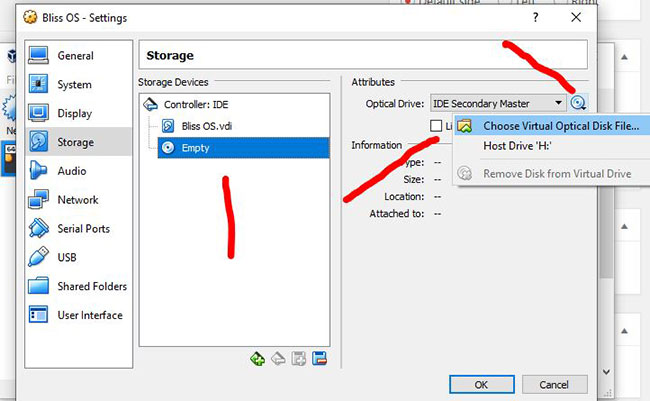
Step 8 : Now, click on the Setting icon from the Virtualbox menu and select the Storage option , then select the Empty CD disc icon . Then just click on the provided CD icon in Attributes section and choose Choose Virtual Optical Disk File . to specify the downloaded Bliss ISO file for Virtualbox and install.
Step 9 : Click the OK button and then click Start to start the virtual machine. Perform the same procedure as mentioned for PC setup again.
Step 10 : After the installation is complete on the virtual machine, the operating system will ask to reboot. So, first remove the inserted ISO from Virtualbox by right clicking on the CD icon in the lower right.
Finally, the operating system has been installed.
- How to install macOS in VirtualBox
- Bliss OS, an 'Android variant' for an x86 PC is worth a try
- How to fix mouse error and virtual machine keyboard in VirtualBox
- How to install VirtualBox Guest Additions on Kali Linux
- How to Install Ubuntu on VirtualBox
- Install Android on your computer, run Android in parallel with Windows with Virtualbox