How to install PowerShell 7.0 in Windows 10/8/7
PowerShell 7 is the latest major update for PowerShell. PowerShell includes command line shells, object-oriented programming languages, along with a set of tools for script / cmdlet execution and module management.
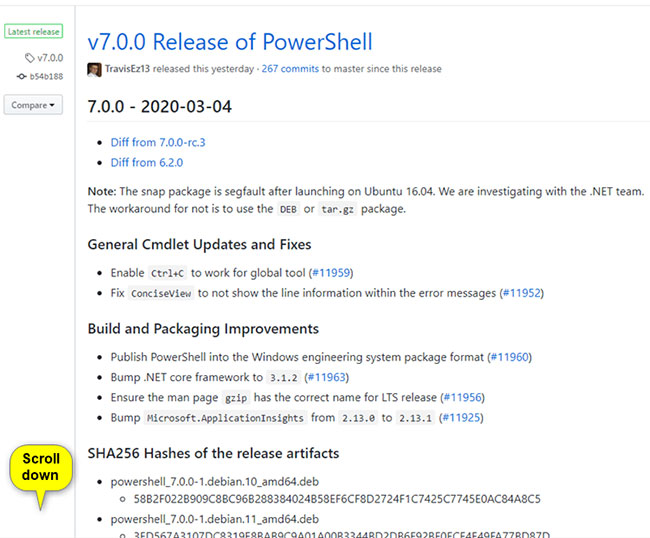
Microsoft announced the release of PowerShell 7.0 on March 4, 2020.
PowerShell 7 is the latest major update for PowerShell. PowerShell includes command line shells, object-oriented programming languages, along with a set of tools for script / cmdlet execution and module management.
This tutorial will show you how to download and install PowerShell 7.0 in Windows 7, Windows 8.1 and Windows 10.
Note : You must be logged in as an administrator to install PowerShell 7.0.
Installing PowerShell 7.0 will not replace the integrated Windows PowerShell included with Windows by default.
Here's how:
1. Go to the Powershell release page 7.0.0 on GitHub.
https://github.com/PowerShell/PowerShell/releases/tag/v7.0.0
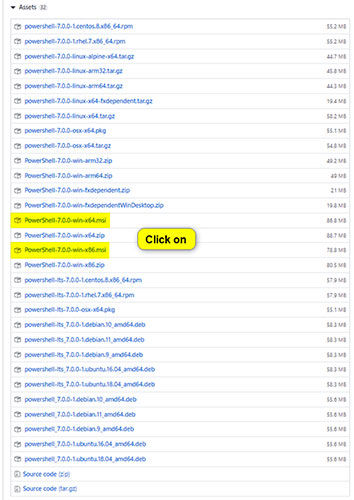
2. Scroll down to Assets for Powershell 7.0.0 and click on the MSI file link (eg "PowerShell-7.0.0-win-x64.msi" ) for 32-bit or 64-bit versions.
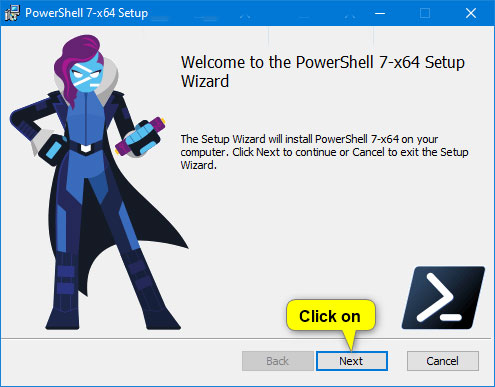
3. Save the MSI file (eg "PowerShell-7.0.0-win-x64.msi") to the desktop and run it.
4. Click Next 2 times.
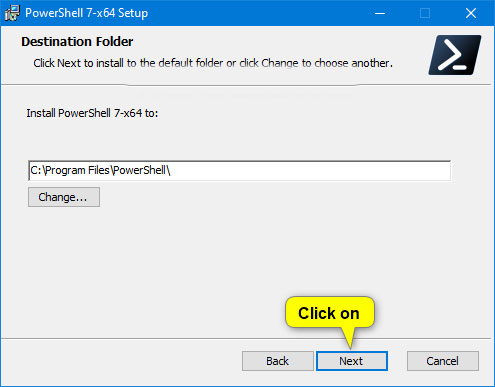
Note : If you want to change where PowerShell 7.0 is installed, first click the Change button and select the folder or drive location you want to install instead.
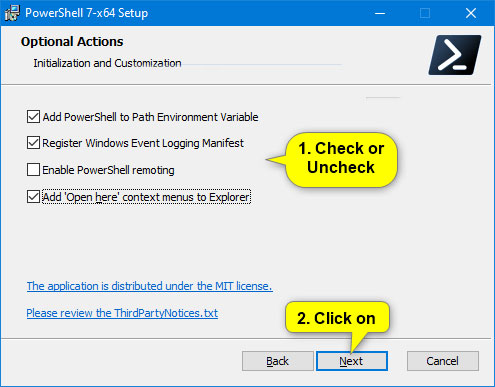
5. Check the options you want, uncheck the options you do not want and click Next.
6. Click Install.

7. If prompted by UAC, click Yes to approve.
8. Click Finish.
Note : Check the Launch PowerShell box before clicking Finish if you want to open Powershell 7.0 now.

- Use PowerShell to download any file on Windows 10
- PowerShell command in Windows
- Now you can run PowerShell on both Linux and macOS
- How are Command Prompt (cmd) and PowerShell different?
- How to use PowerShell's default parameter to change the command behavior
- How to add 'Open PowerShell window here as administrator' to the right-click menu on Windows 10