How to Turn a 2D Image Into 3D Using Blender
Simple 2D images, such as a logo, can easily be converted into 3D images in Blender 3D. The easiest way to do this is to first convert the image into a vector image using a vector graphics editor such as Adobe Illustrator, or Inkscape....
Method 1 of 3:
Converting an Image to SVG using Adobe Illustrator
-
 Open Adobe Illustrator. Adobe Illustrator has a yellow square icon that says "Ai" in the middle. Click the icon on your computer to open Adobe Illustrator.
- Adobe Illustrator requires a subscription to Creative Cloud to download and use. You can sign up for a free trial at adobe.com or you can use Inkscape, which is a free alternative to Adobe Illustrator.
-
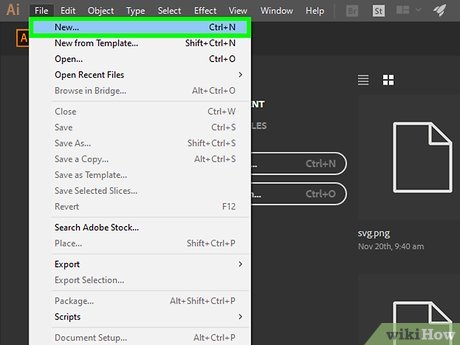
Create a new Adobe Illustrator file. Click New on the title page of Adobe Illustrator to create a new Illustrator project. The dimensions of the project do not matter. You can also create a new file using the following steps:
- Click File in the menu bar at the top.
- Click New.
- Type a name for the project next to "Name:"
- Click Ok.
-
Place the image you want to convert to an SVG. The ideal image to convert to an SVG should be a simple, flat image such as letters or a logo. The image shouldn't have more than 2 or 3 colors. Complex images, such as photographs will not easily convert to an SVG image. The image can be a JPEG, PNG, GIF, or other image formats. Use the following steps to place an image into your Illustrator project:
- Click File in the menu bar at the top of the page.
- Click Place.
- Select the image you want to place.
- Click Place.
-
Select the image. To select the image, click the icon that resembles a mouse cursor in the toolbar to the left and then click the image.
-
Open the Tracing Options menu. The Tracing Options menu is where you can edit the options that convert an image into a vector graphic. Use the following steps to open the Tracing Options menu:
- Click Object.
- Click Live Trace.
- Click Tracing Options.
-
Click the checkboxnext to "Preview". It's on the right side of the Tracing Options menu. This allows you to see what the image will look like after it is converted to a vector graphic.
-
Select a color mode. Use the drop-down menu next to "Mode" to select the color mode. If you are working with an image that has one solid color, select "Black and white". If you are working with a color image, select "Color"
- In Color mode, you can use the box next to "Max Color" to select the maximum number of colors the image will create. Ideally, the image shouldn't have more than 2 or 3 colors.
-
Adjust the threshold. If the lines in the vector image don't match the original image exactly, you can increase the threshold. Increasing the threshold increases the number of pixels that get traced as part of the object. Click the bracket icon pointing right next to the "Threshold" box to display a slider bar. Click and drag the slider bar to the right to increase the threshold.
- If the edges of the image still don't quite match the original, you can try decreasing the options for "Path Fitting", "Minimum Area", and "Corner Angles."
-
Click the checkboxnext to "Ignore Whites" (optional). If you are working with an image that has a white background, you can click the checkbox next to "Ignore whites". This will tell Illustrator to ignore the white parts of the image and only trace the colored objects. Be aware that this will also ignore any white parts of an image that you may want to keep.
-
Click Trace. If you are satisfied with how the traced preview looks, click Trace in the Tracing Options menu to finalize your settings.
-
Trace the image. Use the following steps to trace the image using the option you specified in the Tracing Options menu:
- Click Object in the menu at the top.
- Click Live Trace
- Click Expand.
-
Edit the image manually (optional). If you weren't able to get Live Trace to trace the image perfectly, you can manually edit the edges using the sub-selection tool. Click the icon that resembles a white mouse cursor in the toolbar to the left. Then you can click and drag the vector points on the lines and corners to move them. You can also click and drag the bezier curves (the lines with a dot that extend from a selected vector points) to adjust the curves in between the vector points.
-
Save the image as an SVG. Use the following steps to save the image as an SVG.
- Click File in the menu bar at the top.
- Click Save As.
- Type a name for the image next to "File Name".
- Use the drop-down menu next to "Save as Type" to select SVG.
- Click Save
- Click Ok.


Method 2 of 3:
Converting an Image to SVG Using Inkscape
-
Open Inkscape. Inkscape has an icon that resembles a black diamond being painted. Click the Inkscape icon to open Inkscape.
- You can download Inkscape for free here.
-
Import an image you want to convert into an SVG graphic. The ideal image to convert to an SVG should be a simple, flat image such as letters or a logo. The image shouldn't have more than 2 or 3 colors. Complex images, such as photographs will not easily convert to an SVG graphic. The image can be a JPEG, PNG, GIF, or other image formats. Use the following steps to place an import an image into Inkscape:
- Click File.
- Click Import
- Select the image you want to convert into SVG.
- Click Open.
-
Select the image. To select the image, click the icon that resembles a mouse cursor in the toolbar to the left and then click the image.
-
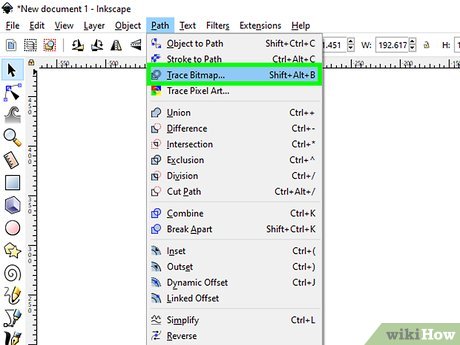
Open the Trace Bitmap menu. Use the following step to open the Trace Bitmap menu:
- Click Path.
- Click Trace Bitmap.
-
Click the checkboxnext to "Live Preview". This displays what the traced image will look like in the preview window.
-
Select a scan option. Click the radial button to select a scan option. The options are as follows:
- Edge Cutoff: This option uses the shade of a pixel to determine if it should be traced as part of the shape. Use the threshold box next to this option to increase the threshold to include more shades. The image output will be in black and white.
- Edge Detection: This option uses the brightness of the pixels to determine if they should be part of the shape. Use the threshold box next to this option to increase the threshold to include more brighter shades in the image. The image output will be in black and white.
- Color quantization: This option uses colors to determine the shape. Use the number of colors option to specify how many colors should be included in the shape. The output will be a black and white image.
- Brightness Steps: This option produces multiple shapes based on the brightness of the pixels.
- Colors: This option produces multiple shapes based on color.
- Greyscale: This option is similar to color, but outputs shapes in shades of grey instead of color.
-
Uncheckthe box next to smooth. This option adds a blur effect to the image. This does not convert to 3D objects well.
-
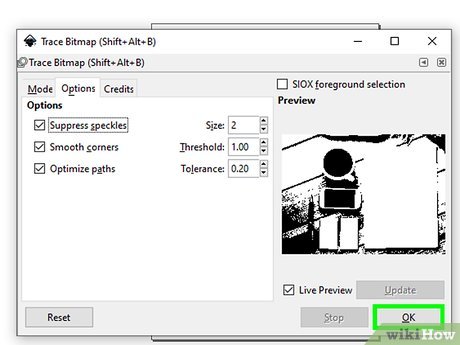
Adjust additional options (optional). To adjust additional options click the Options tab and adjust the following options:
- Suppress Speckles: Check this option to ignore small spots in the image. Use the box next to "Size" to specify the size in pixels of the spots that should be ignored.
- Smooth Corners: Check this option to smooth out sharp corners. Use the box next to "Threshold" to specify how sharp the corners that are to be smoothed out should be.
- Optimize Paths: Check this option to produce a shape using the smallest amount of bezier curves possible.
-
Click Ok. This produces a shape(s) based on the specifications you set in the Trace Bitmap menu.
-
Drag the shape away from the image. Click and drag to move the shape away from the original image.
- At this point, you may notice the traced object doesn't look quite right. If so, just delete it and adjust the Trace Bitmap settings to create a new object.
-
Edit the shape(s) manually. If you need to smooth out any of the lines or edges in the shape, you can do so manually using the "Edit Paths by Node" tool. It's the icon that resembles a triangle clicking a vector point on a line. It's in the toolbar to the left. Use this tool to click and drag the vector points on the lines and corners. You can also click and drag the bezier curves (the lines with dots extending from the vector points) to adjust the curves in between lines.
-
Delete the original image. To delete the original image, click the icon that resembles a mouse cursor in the toolbar to the left. Then click the image and press the Delete key.
-
Save the image. Since SVG is the native format to Inkscape, you don't need to save the image in any special format. Just use the following steps to save the image:
- Click File in the menu bar at the top.
- Click Save As.
- Type a name for the image next to "File Name".
- Click Save.


Method 3 of 3:
Converting an SVG to a 3D Mesh In Blender 3D
-
Open Blender 3D. Blender 3D has an orange, white, and blue circle icon with some orange lines sticking out of the top. Click the Blender 3D icon to open Blender 3D on your computer.
- Blender 3D is a free 3D animation and editing suite. You can download Blender 3D from blender.org
-
Delete the cube. When you open a new file in Blender 3D, it starts you off with a simple scene with a camera, light, and a cube. To delete the cube, click it to select it. Selected objects are highlighted in orange. Then press the Delete key to delete it.
-
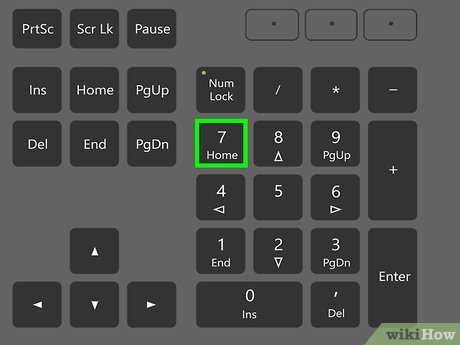
Switch to an overhead view. To switch to an overhead view in Blender 3D, press 7 on the number pad on the right side of your keyboard or use the following menu steps:
- Click View in the upper-left corner of the 3D viewport.
- Click Viewpoint.
- Click Top.
-
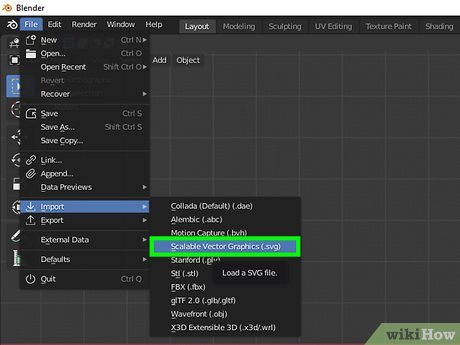
Import the SVG into Blender 3D. Use the following steps to import the SVG file into Blender 3D:
- Click File in the menu bar at the top.
- Click Import.
- Click Scalable Vector Graphic (.svg).
- Select the SVG file you want to import.
- Click Import SVG in the lower-left corner.
-
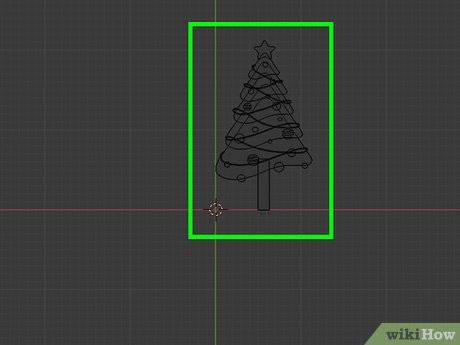
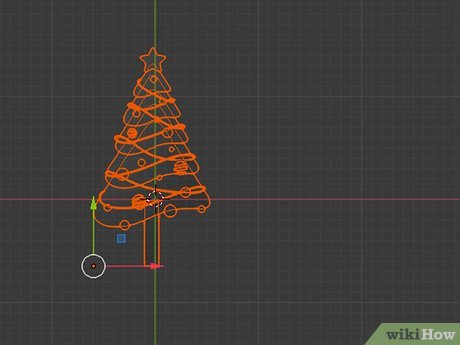
Zoom in and select the SVG. Roll the mouse wheel up to zoom in in Blender 3D. When you see the SVG, click and drag a box around it to select it.
-
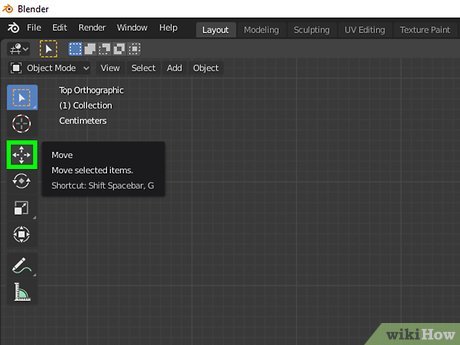
Move the SVG to the center of the grid. To move an object, click the cross-arrow icon in the toolbar to the left. Click and drag the object to move it. Click again to place the object.
- You can also press G on your keyboard and drag your mouse to move an object.
-
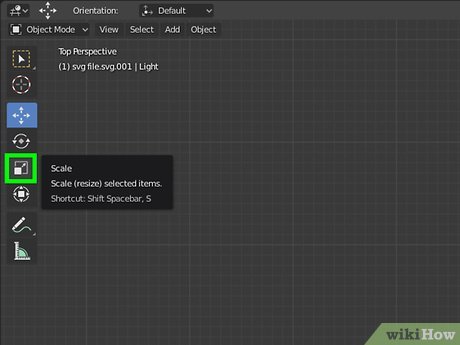
Scale the SVG to the size you want. To change the size of an object, click the icon that resembles a square with an arrow pointing to a larger square in the toolbar to the left. The click and drag the mouse to change the size of your object. Click again to set the size of the object.
- You can also press S on your keyboard and drag the mouse to change the size of an object.
- You may need to move the object back to the center when you are finished.
-
Convert the SVG to a mesh. Converting the SVG to a mesh allows you to edit the object in Blender 3D. Use the following steps to convert the SVG to a mesh.
- Click and drag a box around the SVG to select it.
-
Click Object at the top of the 3D viewport.
- Click Convert to.
- Click Mesh from Curve/Meta/Surf/Text.
-
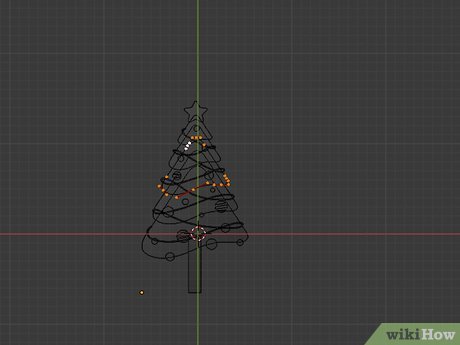
Select the new mesh. To select a mesh in Blender 3D, simply click it. A selected object is highlighted in orange.
-
Switch to Edit mode. To switch to Edit mode, click the drop-down menu that says Object mode in the upper-left corner of the 3D viewport. Then select Edit Mode.
-
Select the entire 3D mesh. Edit mode allows you to edit one mesh at a time. Click and drag a square around the 3D mesh to select the entire mesh, or press A on your keyboard to select everything.
-
Switch to a side view. The mesh should look like a flat line from the side. Use the following steps to switch to a side view, or press 3' or 1 on the number pad on the right side of your keyboard:
- Click View at the top of the 3D viewport.
- Click Viewport.
- Click Front, Back, Right or Left.
-
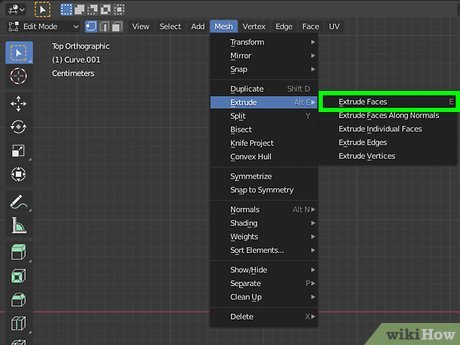
Extrude the faces of the mesh. Extruding faces of the object changes the mesh from a flat object to a 3D shape. Press E on your keyboard and drag the mouse to the desired height, or use the following steps to extrude the faces of the object:
- Click Mesh at the top of the 3D viewport.
- Click Extrude.
- Click Extrude faces.
- Drag the mouse to the desired height.
-
Switch back to Object Mode. To switch back to Object mode, click the drop-down menu that says "Edit Mode" in the upper-left corner of the 3D viewport. Then click Object Mode.
-
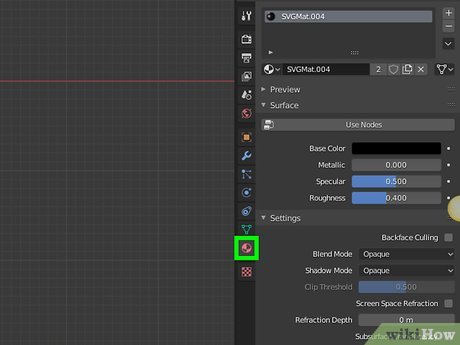
Edit the material properties of the object. To edit the material properties of an object, click the icon that resembles a red sphere in the sidebar menu to the right. Use the following options to change the material properties of the object:
- Base color: Click the colored box next to Base color and then use the color wheel under the "RGB" tab to select the base color of the object.
- Metallic: Use the slider bar next to "Metallic" to adjust the reflective (mirror) properties of the object.
- Specular: Use the slider bar next to "Specular" to adjust how intense the reflective properties of the object are.
- Roughness: Use the slider bar next to "Roughness" to adjust how rough or smooth the reflective properties of the object are.
-
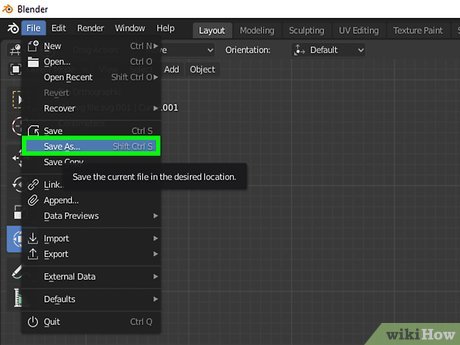
Save your work. When you are satisfied with how the 3D object looks, use the following steps to save your work:
- Click File.
- Click Save As.
- Type a name for the blender file in the field at the bottom of the window.
- Click Save As.