Instructions for separating column content in Excel
To separate content in an Excel field into different columns, we can use two different ways.
Separating data in an Excel field into different columns is not too complicated, often encountered when processing data such as separating information in Full name in Excel. Then the data is merged into a column, and the user needs to separate the information into different columns.
On previous versions of Office to extract content in an Excel column, you often had to use a rather complex string splitting function. However, with Excel 2013 and above, we can use the Flash Fill tool to separate the values in a certain field into the cells on the worksheet. The following article will guide the separation of data on Excel 2013 and later and how to extract data on Excel 2007.
- How to repeat titles in Excel 2007, 2010 and 2013 when printing
- How to activate Microsoft Office 2019 Professional Plus
- How to convert money into words in Excel
1. Instructions for separating Excel 2013, 2016, and 2019 content
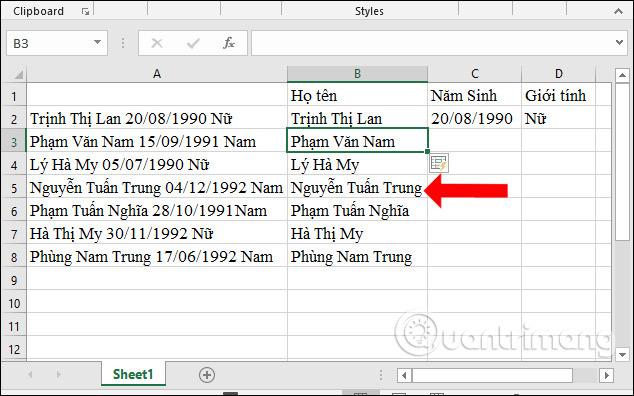
We will have the following data table with student information in the same column, and need to separate 3 separate columns including First Name, Year of Birth and Gender.

Method 1: Use shortcut Ctrl + E for Flash Fill
Step 1:
First, enter the complete information for the first row in the data table.

Step 2:
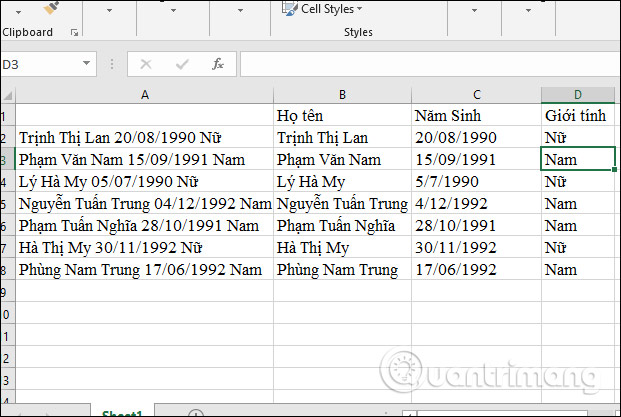
Then press Enter to go to the next cell and then press Ctrl + E again to complete the list of names left in each cell.
Do the same with the other two columns of Birth and Gender.
Method 2: Split data through the Data Flash Fill menu
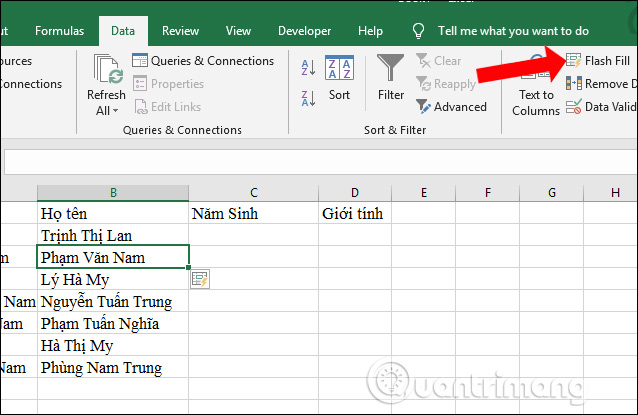
Users also enter the information in the first box in the Name column, then click on the second line. Click on the Data tab on the ribbon and then click Flash Fill to enter the corresponding values in the remaining cells in the column. .
Method 3: Use the Manual Fill tool
Step 1:
At the column User name entered the information for the first cell. Then hover over the position of the first cell to display the plus sign in the lower right corner of the cell and drag it down to the bottom of the list of columns.
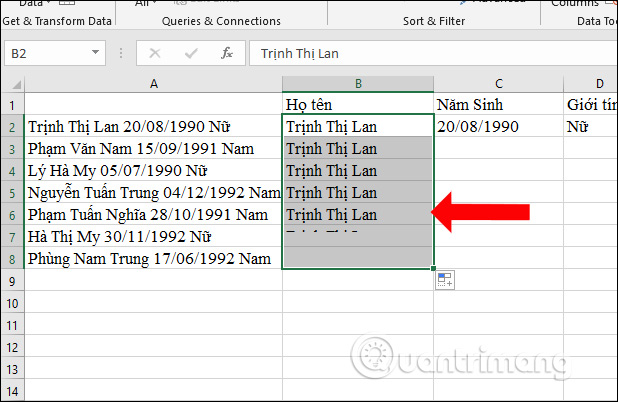
Step 2:
Then at the bottom corner of the column will show the drop-down triangle icon , click then select Flash Fill in the displayed list.
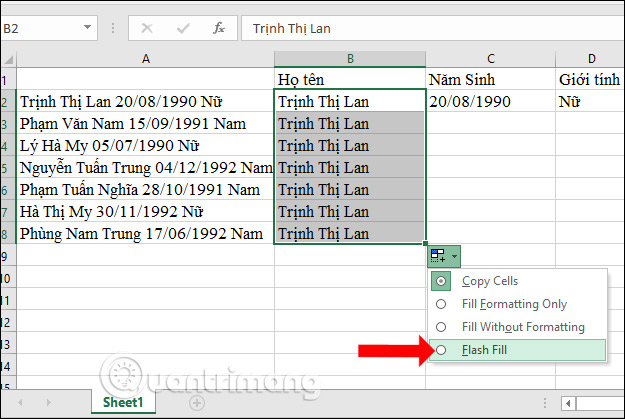
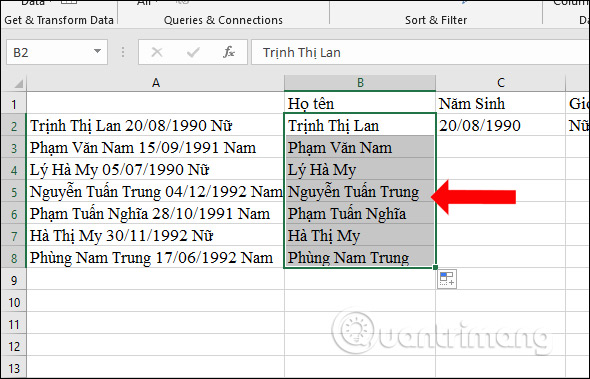
Immediately the correct values will be replaced as shown below. We perform the same operation with 2 columns of Birth and Gender.
Flash Fill tool will only apply from Word 2013 or later. With the final manual method, the corresponding index for each cell is more effective and standard than the above two ways. If you are using an Office 2010 version or below, use the Text to Columns tool, following the instructions below.
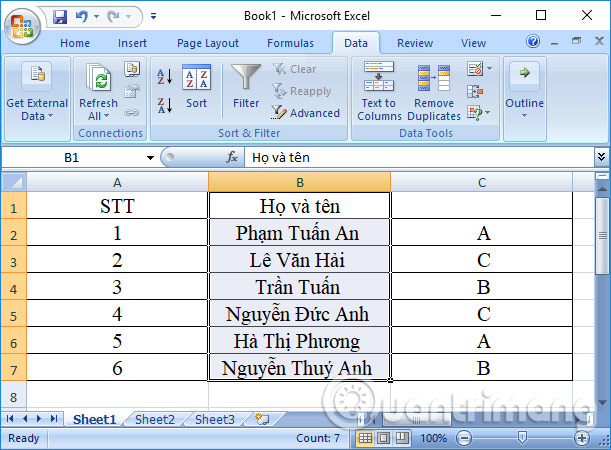
2. How to separate column content in Excel 2010, 2007
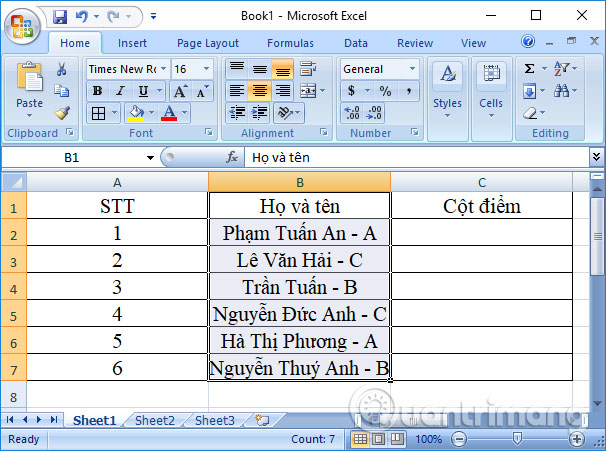
In the table of contents below, we will have the last and last name column along with the score for each person. Full name is connected by a dash with a score in the same column. I will proceed to separate this column of information into 2 separate columns, 1 column is Full name and the other column is the score.
Step 1:
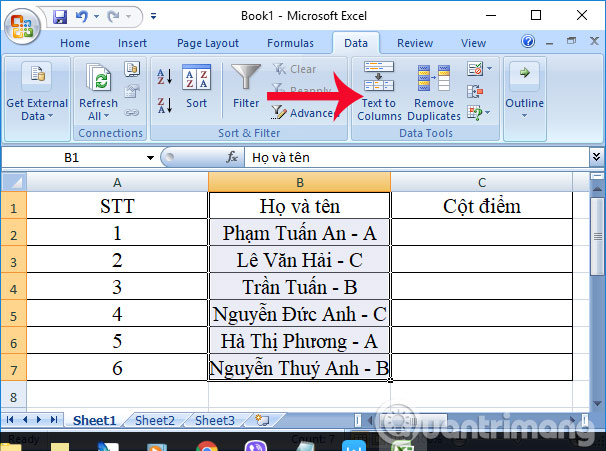
In the Excel table content, you need to black out the content of the area to be separated into a different column. The irrelevant title and content section will not need to be blacked out. Then, click on the Data tab on the Ribbon, then click on the Text to Columns section .
Step 2:
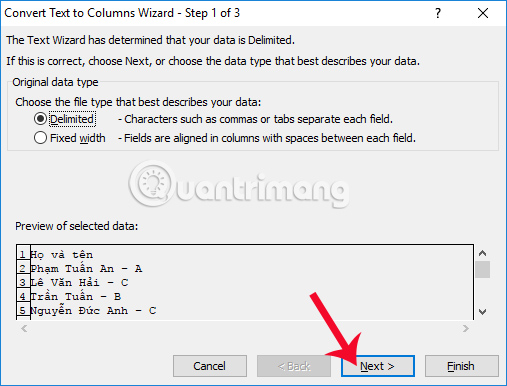
The interface of the Convert Text to Columns Wizard dialog box appears. Here you will need to take 3 steps to get the column of content you want to split. First of all, the Original data type will have 2 column splitting options including:
- Delimited: proceed to separate columns with separating characters such as tabs, dashes, commas, spaces .
- Fixed with: separates the column according to the width of the data, for example, the data consists of 2 columns, although each row has a different length, but equally divided into 2 identical intervals.
In the article using the dash to separate the content, I will select the Delimited option, then click Next below.
Step 3:
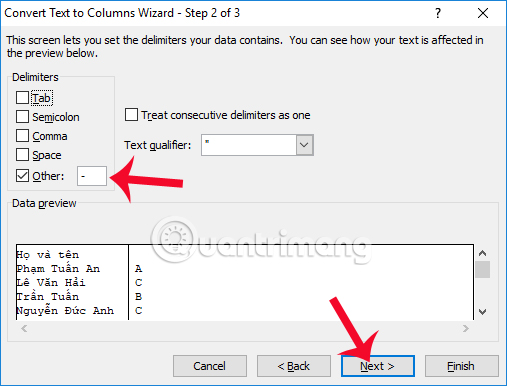
Next, go to Delimiters and select the delimiter in the column you want to split. There will be options including:
- Tab: content is separated by a tab space.
- Semicolon: way with a semicolon.
- Comma: use separated by commas.
- Space: use separation with white space.
- Other: use other separators to separate content.
In the content by using a dash to separate the content, click on the Other item and then enter the dash used in the Excel file in the box next to it. Next click Next to go to the last step.
Step 4:
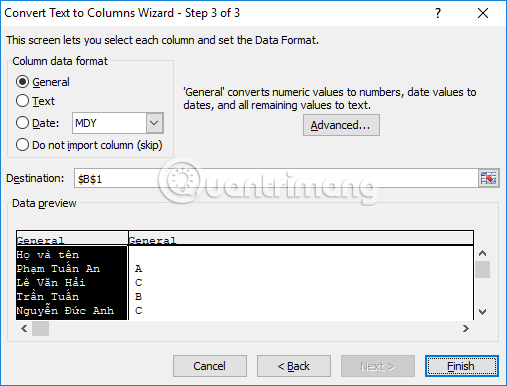
Soon, you will get the results below in the Data preview section. If it is true for the request to split the content in the Excel column as you like, Excel will proceed to separate into two separate columns. Then, you need to click on each content box to select the format for the data . For example, with the first content select Text or General.
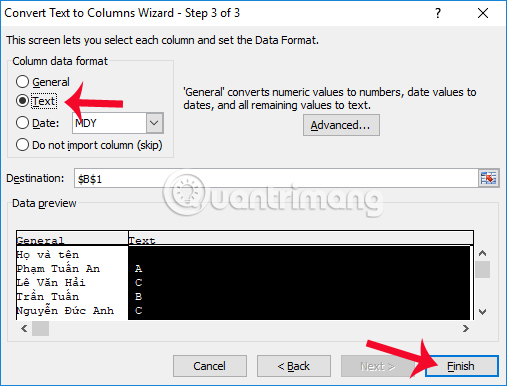
The format for the second cell is also Text. Finally, click Finish at the bottom to end the setup for the Excel split operation.
Step 5:
After that, the message board shown below is displayed , we click OK to agree.

Thus, the content in 1 column of Excel table has been separated into 2 columns with different content, as shown below.
Thus, we have finished separating the content in Excel into 2 separate columns. The operation of separating content in 1 column on Excel is a basic operation, often handled. This will make the content in the table easier to observe and observe.
Video tutorial separating column content on Excel
I wish you all success!
- How to separate email from information in Excel
- Instructions automatic text carriage return in Excel - Auto line breaks when the width of the column in Excel
- Split numbers from strings in Excel
- How to combine 2 columns Full name in Excel does not lose content
- How to delete, add columns in Excel
- Manipulating tables editing in Excel