Steps to Scan documents directly using iPhone or iPad
You can easily scan documents and convert them into PDF files with your iPhone or iPad.
Scanning documents is a common practice in the process of studying and working. There are quite a few document scanning apps on the app store. But you don't need those apps at all if you own an iPhone or iPad. Here's how you scan a document to PDF using iPhone and iPad.
Step 1: Open the Notes app
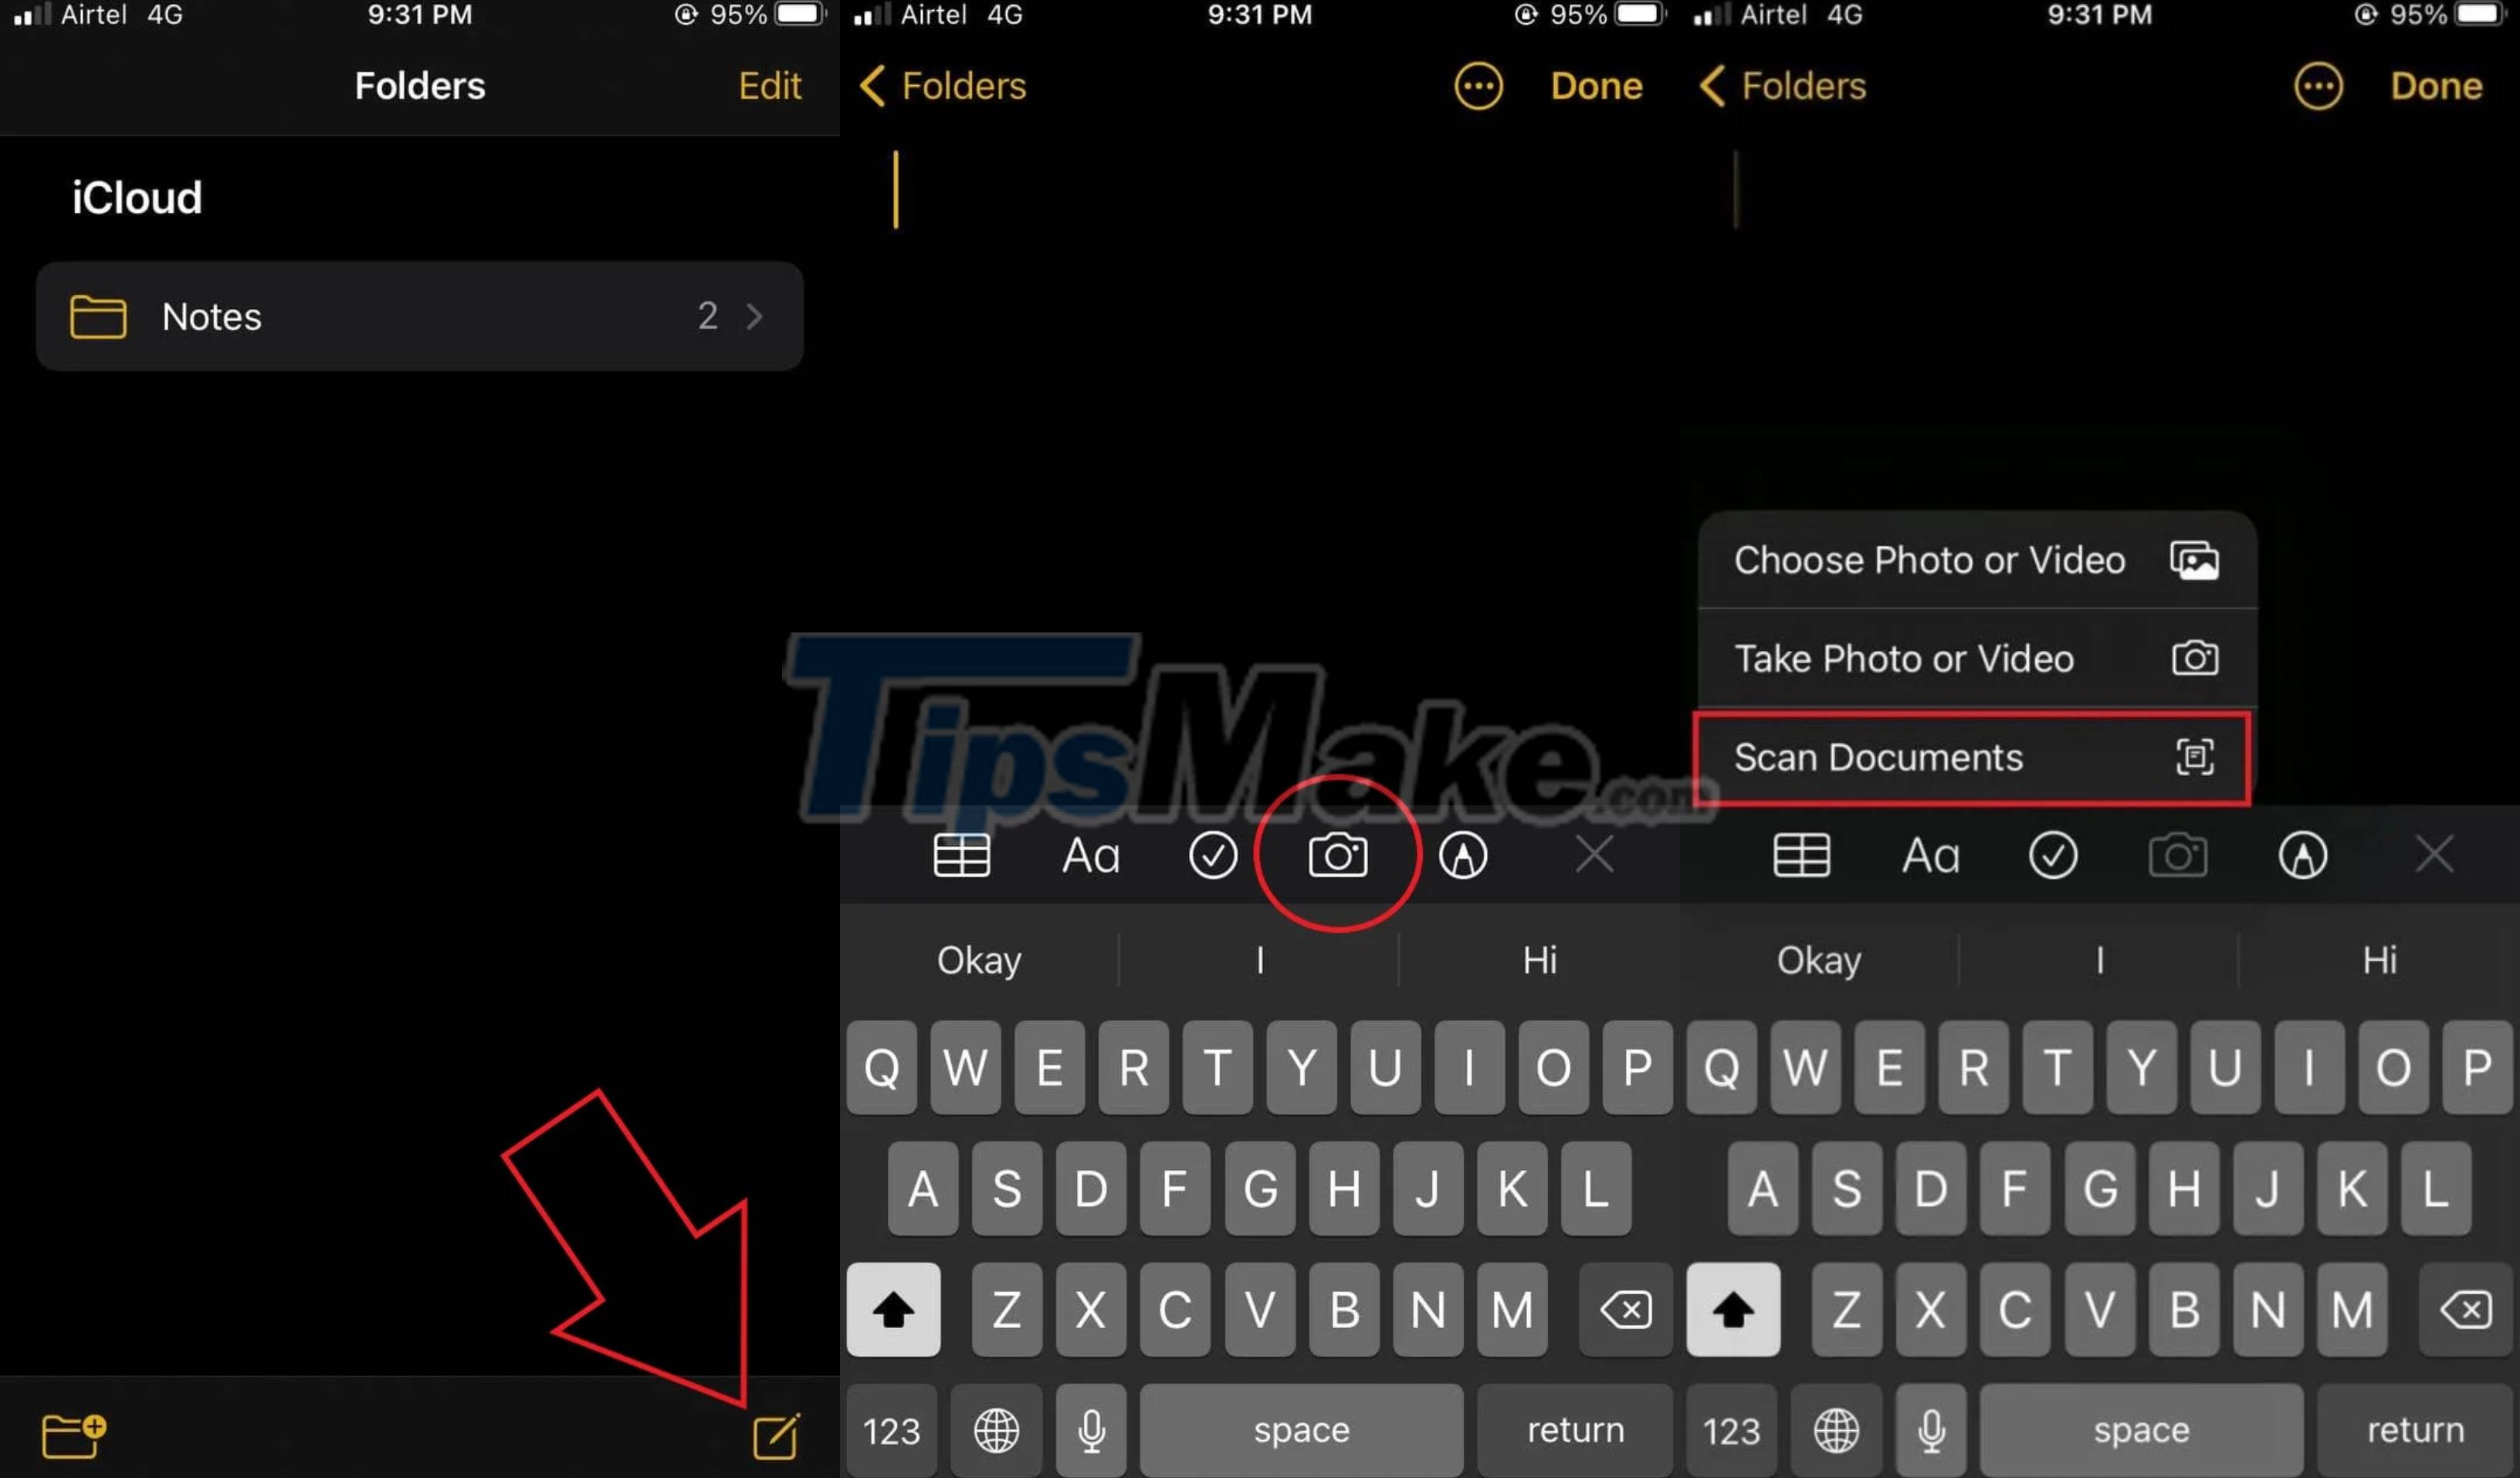
In the Note app, when you create a new note, you'll see a small camera icon in the bottom corner. Touch this icon and go to the bottom corner, you will see the option to Scan documents.
Step 2: Select the scan area
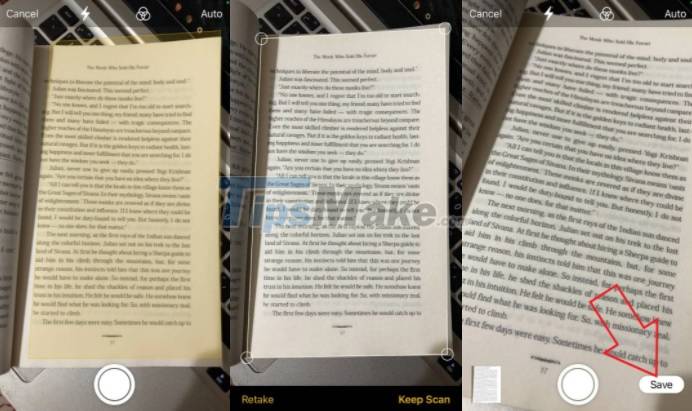
After choosing to scan a document, you can take the machine to the part of the document to be scanned. The application will automatically recognize the area with the scanned information in a yellow frame and automatically record. You can also do it manually by pressing the shutter button.
Step 3: Edit the document

After scanning the document, you will have options to make the necessary edits. You can use the crop tool to adjust the corners or cut out parts you don't need. You can also change document colors to grayscale, black and white, and photos, or rotate pages.
If you want to add more pages, tap the "+" icon at the bottom right and continue capturing the document as in step 2.
Step 4: Save and share the document
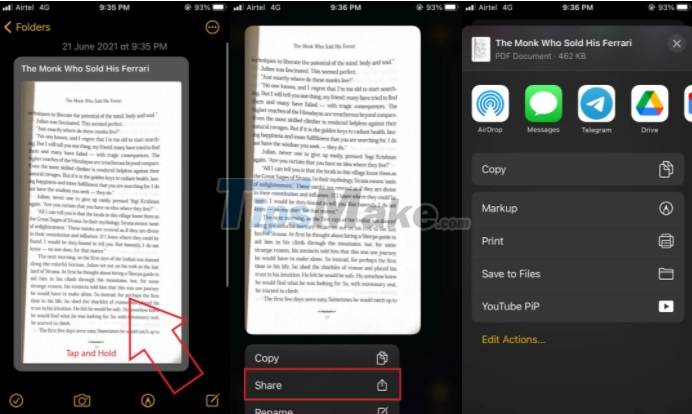
After you finish scanning and editing the document, the File will automatically save as a PDF so you can share it via email or messaging apps. You can also save documents locally or upload them to storage applications such as Google Driver.
Thus, you have completed scanning documents with iPhone and iPad without installing additional third-party applications. Good luck.
 Lesley Montoya
- How to scan documents using Notes app on iOS
- How to scan documents in Windows
- Instructions on how to print content from iPhone and iPad
- Adobe's new Adobe Scan application turns your phone into a document scanner
- Instructions for the easiest way to scan documents into PDF files on Android
- How to scan documents in the Files app on iOS