Steps to lock columns in Excel
Locking columns in Excel with a password helps you protect columns, prevent others from changing column content or editing columns, affecting all data of the table.
This helps others to still be able to see the content without having to set the password of the Excel file to hide the entire content or have to perform hidden column manipulation in Excel. The following article will guide you how to lock columns in Excel.
Instructions for locking columns in Excel
Step 1:
You open the Excel file to lock the column and then black out the entire Excel table . Then click anywhere in the data and select Format Cells… in the displayed list.
Step 2:
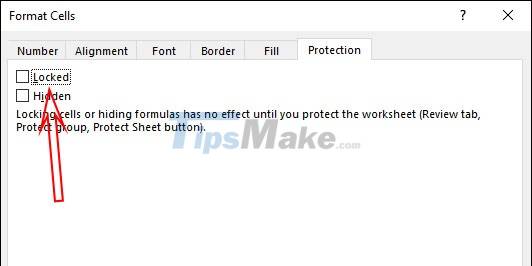
Now display the new interface, we click on the Protection tab and uncheck the Locked item . This operation helps to completely remove the lock for the Excel file, click OK to save it.
Step 3:
Return to the data table, highlight the column to be locked, then right-click and select Format Cells . Then check the Protection tab and check the Locked section to lock this column only. If you want to lock multiple columns, highlight those columns.

Step 4:
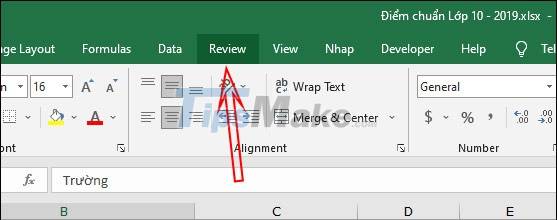
Also click on that column again and then click on the Review tab on the Ribbon.
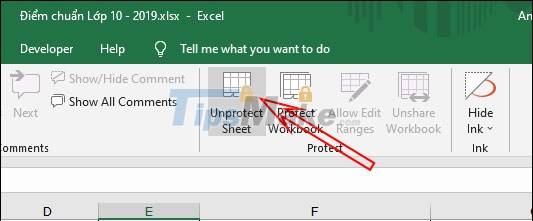
Then look down below in the Protect group and click on the Protect sheet feature .

Now display the new window interface, enter your own password in the Password to unprotect sheet box to proceed to lock the selected Excel data column with the password and then click OK to save.

So when you click on this data column, the message will be displayed as shown below. Others cannot click on the column to proceed with content editing.

Step 5:
To unlock the Excel column , click the Review tab again and select Unprotect Sheet to remove the password. We will then be asked to enter the password we used before to unblock the Excel column.
 Jessica Tanner